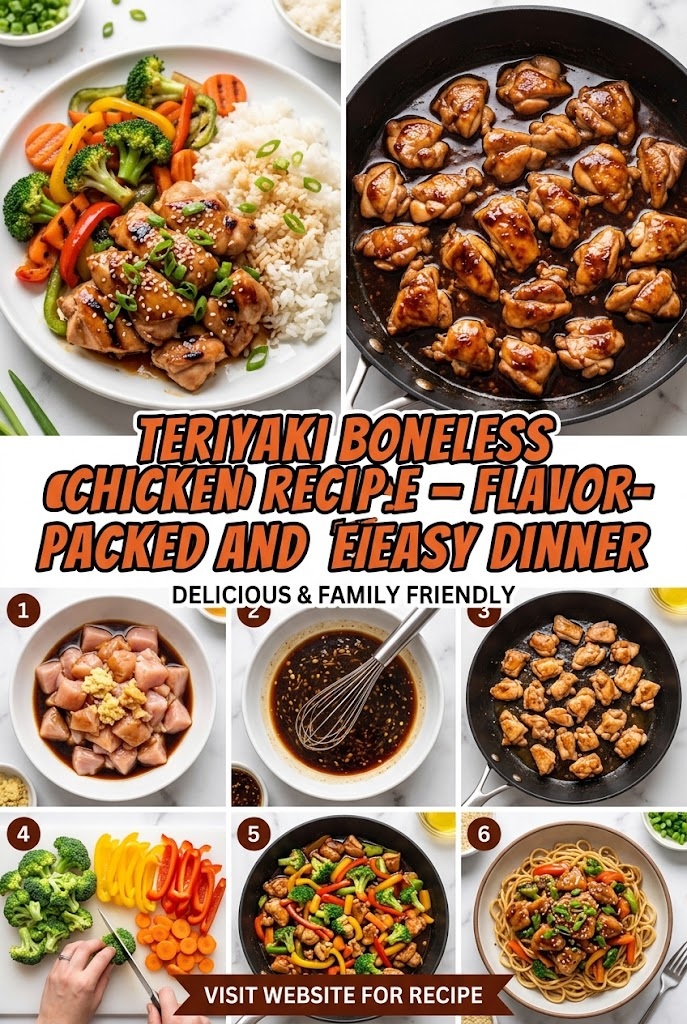
How to Make instant pot teriyaki ground chicken at Home
In the modern, fast-paced world, the quest for a meal that is simultaneously healthy, delicious, and incredibly quick to prepare is the “holy grail” of home cooking. Enter the Instant Pot Teriyaki Ground Chicken. This dish isn’t just a recipe; it’s a lifestyle hack for busy families, fitness enthusiasts, and anyone who appreciates the savory-sweet harmony of Japanese-inspired flavors.
Using an Instant Pot (or any multi-cooker) transforms what used to be a hands-on sautéing process into a set-it-and-forget-it masterpiece. Ground chicken, often overlooked in favor of breasts or thighs, is the secret weapon here. It’s lean, affordable, and has a unique ability to soak up every drop of a rich, homemade teriyaki glaze.
In this comprehensive guide, we will explore everything you need to know to master this dish, from the science of the perfect teriyaki sauce to troubleshooting common Instant Pot errors.
Why Ground Chicken is the Perfect Protein for the Instant Pot
When people think of “Teriyaki Chicken,” they usually envision grilled thighs or stir-fried breast strips. However, ground chicken offers several distinct advantages, especially when using a pressure cooker.
1. Maximum Flavor Absorption
Because ground chicken has a higher surface-area-to-volume ratio than whole cuts, every tiny morsel gets coated in sauce. This results in a more consistent flavor profile in every single bite.
2. Speed of Cooking
Ground meat cooks significantly faster than whole pieces of poultry. In an Instant Pot, ground chicken reaches a safe internal temperature almost instantly once the pot comes to pressure, ensuring the meat stays tender rather than becoming rubbery.
3. Budget-Friendly
Ground chicken is frequently more affordable than organic chicken breasts or specialty cuts. It’s a great way to feed a large family or meal-prep for a week without breaking the bank.
The Anatomy of a Perfect Homemade Teriyaki Sauce
Forget the bottled stuff. Most store-bought teriyaki sauces are loaded with high-fructose corn syrup, excessive sodium, and artificial thickeners. Making your own in the Instant Pot is easy and allows you to control the depth of flavor.
The Essential Components:
- Soy Sauce: This provides the salty, umami base. For a gluten-free version, use Tamari or Coconut Aminos.
- Sweetener: Traditional teriyaki uses sugar, but for a richer flavor, brown sugar or honey works best. If you’re watching your glycemic index, maple syrup or a keto-friendly sweetener like monk fruit can be substituted.
- Aromatics (The “Soul” of the dish): Freshly grated ginger and minced garlic are non-negotiable. They provide the aromatic heat and fragrance that define the dish.
- Acid: A splash of rice vinegar or apple cider vinegar balances the sugar and cuts through the richness of the meat.
- Mirin or Sake: These Japanese staples add a subtle tang and a professional-grade “gloss” to the sauce.
Step-by-Step Instructions for Instant Pot Teriyaki Ground Chicken
Follow these steps carefully to ensure the best texture and to avoid the dreaded “Burn” notice on your Instant Pot.
Ingredients You Will Need:
- 1.5 lbs Ground Chicken: Lean or extra lean.
- 1/2 cup Soy Sauce: Low sodium is recommended.
- 1/4 cup Brown Sugar or Honey: Adjust based on your sweetness preference.
- 1 tbsp Rice Vinegar: For a bright finish.
- 1 tsp Sesame Oil: Adds a toasted, nutty depth.
- 3 cloves Garlic: Minced fine.
- 1 tbsp Fresh Ginger: Grated.
- 1/4 cup Water or Chicken Broth: Essential for the Instant Pot to reach pressure.
- Cornstarch Slurry: 2 tbsp cornstarch mixed with 2 tbsp cold water.
- Garnish: Toasted sesame seeds and sliced green onions.
Detailed Cooking Process:
1. The Sauté Phase
Turn your Instant Pot to the Sauté function. Add a teaspoon of oil (avocado or vegetable oil works well). Once hot, add the ground chicken. Use a wooden spoon or a meat masher to break the chicken into small crumbles. Sauté until the chicken is mostly browned.
Pro Tip: You don’t need to cook it 100% through at this stage; the pressure cooking will finish the job.
2. Deglazing the Pot
This is the most critical step for Instant Pot success. After browning the chicken, there might be brown bits stuck to the bottom of the liner. Add your water or chicken broth and use your spatula to scrape the bottom thoroughly. If these bits remain, they can trigger the “Burn” sensor.
3. Adding the Sauce Ingredients
Pour in the soy sauce, brown sugar, rice vinegar, sesame oil, garlic, and ginger. Stir everything together so the chicken is well-coated.
4. Pressure Cooking
Secure the lid and set the valve to the Sealing position. Cancel the Sauté function and select Manual/Pressure Cook on High Pressure for 3 minutes.
While it may seem like a short time, the pot takes about 5-8 minutes to come to pressure, during which the chicken is already cooking.
5. The Release
Once the timer beeps, let the pressure release naturally for 5 minutes (NPR), then carefully move the valve to the Venting position for a Quick Release of the remaining steam.
6. The Thickening (The Glaze Stage)
Open the lid. The mixture will look a bit watery—this is normal. Turn the Sauté function back on. Once the liquid starts to bubble, pour in your cornstarch slurry. Stir constantly for 1-2 minutes until the sauce transforms into a thick, glossy glaze that clings to the chicken.
Troubleshooting: How to Avoid the “Burn” Notice
The “Burn” notice occurs when the Instant Pot detects that the bottom of the inner pot is getting too hot, usually because there isn’t enough thin liquid or something is stuck to the bottom.
- Layering Matters: Always put your thin liquids (broth/water) in first or use them to deglaze.
- Avoid Thickening Too Early: Never add cornstarch or thick sauces (like pre-made thick teriyaki) before pressure cooking. Always add thickeners after the pressure cooking cycle is complete.
- Check the Ring: Ensure your silicone sealing ring is properly seated, otherwise, steam will escape, the pot won’t reach pressure, and the liquid will boil away, causing a burn.
Health Benefits and Nutritional Breakdown
One of the reasons this recipe has gained massive popularity in the fitness community is its “Macro-Friendly” profile.
- High Protein: Ground chicken is an excellent source of lean protein, essential for muscle repair and satiety.
- Lower Fat: Compared to ground beef or pork, ground chicken significantly reduces the saturated fat content of the meal.
- Customizable Sugar: By making the sauce at home, you can reduce the sugar content by 50-70% compared to takeout versions.
- Ginger and Garlic: Both ingredients are known for their anti-inflammatory properties and immune-boosting benefits.
Approximate Macros (per serving, without rice):
- Calories: 250 kcal
- Protein: 32g
- Carbohydrates: 12g
- Fat: 8g
What to Serve with Teriyaki Ground Chicken
To turn this into a well-rounded meal, you need the right accompaniments.
The Classic: Jasmine Rice
The floral aroma and slightly sticky texture of Jasmine rice are the perfect foil for the salty-sweet teriyaki sauce. To cook Jasmine rice in the Instant Pot separately: use a 1:1 ratio of rice to water for 3 minutes on high pressure with a 10-minute natural release.
The Low-Carb Option: Cauliflower Rice
For those following a Keto or Paleo lifestyle, sautéed cauliflower rice provides a similar “mouthfeel” to grain-based rice without the heavy carb load. Season it lightly with lime and cilantro for an extra pop of flavor.
The Veggie Boost: Steamed Broccoli and Carrots
You can actually steam broccoli directly on top of the chicken! Simply place a steamer basket over the chicken mixture during the pressure cooking phase. However, note that broccoli only needs about 1-2 minutes, so it may become very soft if cooked for the full 3 minutes. Alternatively, steam them separately for a perfect crunch.
Noodle Lovers: Udon or Rice Noodles
Toss the finished teriyaki chicken with thick Udon noodles or thin rice vermicelli for a “Teriyaki Chow Mein” vibe.
Meal Prepping and Storage Tips
This recipe is a “Meal Prep King.” Because ground chicken stays moist when reheated in sauce, it tastes just as good on Thursday as it did on Monday.
- Fridge Storage: Store in airtight glass containers for up to 4 days.
- Freezer Instructions: You can freeze the cooked teriyaki chicken for up to 3 months. To reheat, thaw in the fridge overnight and microwave with a splash of water to loosen the sauce.
- Portioning: For weight loss or muscle gain goals, weigh out 4-5 oz portions of the chicken and pair them with pre-measured amounts of greens and grains.
Creative Variations to Try
Once you have mastered the base recipe, start experimenting with these delicious twists:
1. Spicy Sriracha Teriyaki
Add 1-2 tablespoons of Sriracha or red chili flakes to the sauce before pressure cooking. The heat balances the sugar beautifully.
2. Pineapple Teriyaki
Replace the water/broth with canned pineapple juice and add a few chunks of fresh pineapple during the sauté phase. This gives the dish a Hawaiian flair.
3. “Hidden Veggie” Teriyaki
For picky eaters or kids, finely dice mushrooms, bell peppers, or zucchini and sauté them along with the chicken. They will shrink down and absorb the sauce, becoming almost indistinguishable from the meat while adding a massive nutrient boost.
4. Teriyaki Lettuce Wraps
Skip the grains entirely and serve the chicken in large Butter or Romaine lettuce leaves. Top with shredded carrots and crushed peanuts for a refreshing, crunchy lunch.
The History of Teriyaki: From Japan to the American Kitchen
The word teriyaki is a combination of two Japanese words: teri, meaning luster or gleam (referring to the shine of the sauce), and yaki, meaning grilled or broiled.
While the traditional Japanese method involves dipping or brushing meat with sauce during the cooking process, the “Saucy Teriyaki” we know and love today actually gained its massive popularity in Seattle, Washington, in the 1970s and 80s. It was here that Korean-Japanese immigrants adapted the flavors to American palates, making the sauce sweeter and more abundant.
Using an Instant Pot is the latest evolution of this culinary journey, bringing those historic flavors into the 21st-century kitchen with modern efficiency.
Frequently Asked Questions (FAQ)
Can I use frozen ground chicken?
Yes, but it is recommended to thaw it first. If you cook it from frozen, you won’t be able to brown the meat (the Sauté phase), which means you’ll lose out on the “Maillard reaction”—the chemical reaction that gives browned meat its deep, savory flavor.
My sauce is too salty, how do I fix it?
If the sauce is too salty, add a tablespoon of rice vinegar or a squeeze of lime juice. The acid helps neutralize the salt. You can also add a splash of water or a little extra sweetener.
Can I use ground turkey instead?
Absolutely. Ground turkey and ground chicken are virtually interchangeable in this recipe. Ground turkey may have a slightly stronger flavor, but the teriyaki sauce is bold enough to complement it perfectly.
Why is my chicken clumping together?
If you don’t break the chicken up thoroughly during the sauté phase, it will cook into large, tough chunks. Use a potato masher or a specialized meat-crumbling tool to get that fine, consistent texture.
Final Thoughts: The Joy of One-Pot Cooking
The Instant Pot Teriyaki Ground Chicken is more than just a meal; it’s a testament to how modern technology can simplify healthy eating. By taking control of the ingredients, you eliminate the hidden sugars and preservatives of takeout while delivering a dish that tastes arguably better.
Whether you’re looking to impress guests with a quick Friday night dinner or you’re preparing 10 meals for a busy work week, this recipe provides the reliability and flavor profile you need. Grab your Instant Pot, some fresh ginger, and high-quality ground chicken—your kitchen is about to smell like the best teriyaki joint in town.
Pro Tip Summary for the Perfect Result:
- Brown the meat for flavor.
- Deglaze the pot to avoid “Burn.”
- Use fresh aromatics for the best smell and taste.
- Thicken at the end for that signature glossy look.
Enjoy your homemade culinary creation!