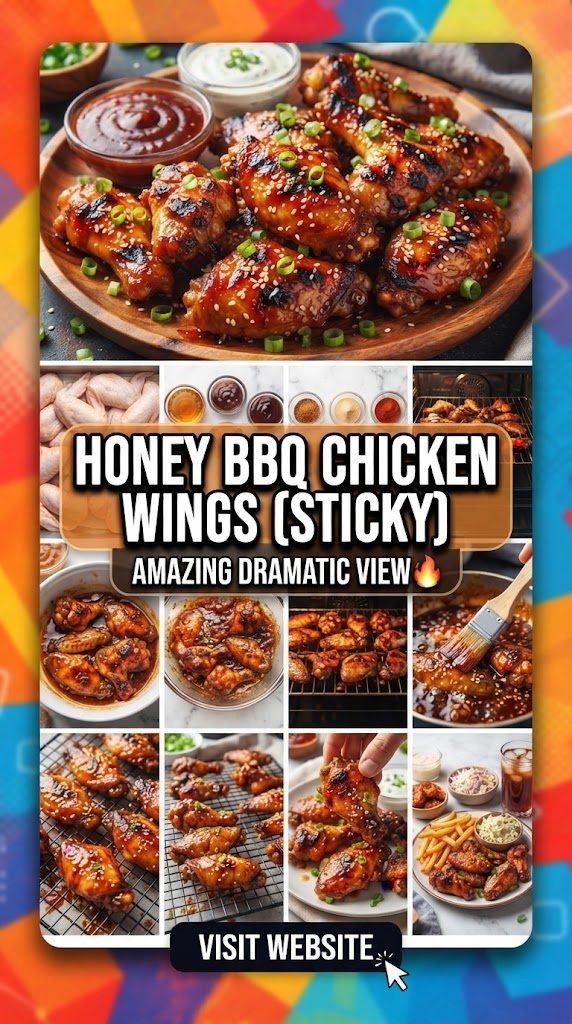
Smoky BBQ Chicken Drumsticks Recipe – Oven-Baked and Easy Meal
There is something fundamentally primal and deeply satisfying about a perfectly cooked chicken drumstick. When you combine that succulent, juicy dark meat with the deep, complex notes of a smoky barbecue glaze, you create a culinary experience that transcends the simplicity of the ingredients. Whether it’s a Tuesday night family dinner, a weekend game day gathering, or a summer potluck where you don’t have access to an outdoor grill, the oven-baked smoky BBQ chicken drumstick is a versatile hero of the kitchen.
Achieving that “just-off-the-pit” flavor in a conventional home oven might seem like a challenge, but with the right techniques, a balance of seasonings, and a focus on texture, you can produce results that rival any smokehouse. This guide will walk you through every nuance of creating the ultimate smoky BBQ chicken drumsticks—from selecting the meat to mastering the “broiler finish.”
Why Drumsticks are the Undisputed Kings of BBQ
In the world of poultry, the drumstick (or lower leg) is often underrated compared to the breast or the wing. However, for BBQ enthusiasts, the drumstick is the gold standard for several reasons:
- High Fat Content: Dark meat contains more fat and connective tissue than white meat. During the baking process, this fat renders out, naturally basting the meat from the inside out and ensuring it remains moist even at high temperatures.
- Forgiving Nature: Unlike chicken breasts, which can turn into dry cardboard if overcooked by even a few minutes, drumsticks are incredibly forgiving. They can handle higher internal temperatures (up to 185°F-190°F) which actually improves their texture by breaking down collagen.
- The Built-in Handle: Drumsticks are the original finger food. They are easy to hold, making them perfect for parties and children.
- Affordability: Pound for pound, drumsticks are one of the most cost-effective cuts of meat available, allowing you to feed a crowd without breaking the bank.
The Secret to “Smoky” Flavor Without a Smoker
The biggest hurdle in oven-baking BBQ chicken is replicating the wood-fired essence of a traditional smoker. To achieve this indoors, we rely on a “layers of flavor” approach.
1. Smoked Paprika (Pimentón)
This is your most valuable player. Unlike regular sweet paprika, smoked paprika is made from peppers that are dried over oak fires. It provides a deep, earthy red color and a concentrated smoky aroma that permeates the skin of the chicken.
2. Liquid Smoke
Often misunderstood, liquid smoke is actually a natural product created by condensing the smoke from burning wood chips into water. A tiny amount (half a teaspoon) added to your sauce or marinade can provide that authentic hickory or mesquite punch.
3. Chipotle Powder or Peppers
Chipotles are smoke-dried jalapeños. Using chipotle powder in your dry rub adds not only a medium heat but also a distinct, leathery smokiness that complements sweet BBQ sauces beautifully.
4. Canned Adobo Sauce
If you prefer a wet marinade, the sauce found in cans of chipotle peppers is a “cheat code” for smoky depth.
Ingredients: Everything You Need
To make about 10 to 12 large drumsticks, you will need to gather the following ingredients. We have divided them into the “Dry Rub” and the “Basting Sauce.”
The Chicken
- 3 to 4 lbs Chicken Drumsticks: Look for skin-on, bone-in legs with a bright, pinkish hue.
The Smoky Dry Rub
- 2 tablespoons Brown Sugar: To encourage caramelization and balance the salt.
- 1 tablespoon Smoked Paprika: For that essential wood-fired base.
- 1 tablespoon Garlic Powder: For savory depth.
- 1 teaspoon Onion Powder: To round out the aromatics.
- 1 teaspoon Chili Powder: For a hint of complexity.
- 1 teaspoon Salt: (Adjust based on preference, but essential for moisture retention).
- 1/2 teaspoon Black Pepper: Freshly cracked is best.
- 1/4 teaspoon Cayenne Pepper: Optional, for a touch of heat.
The Signature BBQ Glaze
- 1 cup of your favorite BBQ Sauce: Use a thick, molasses-based sauce for better adherence.
- 1 tablespoon Apple Cider Vinegar: To cut through the sweetness and provide “tang.”
- 1 tablespoon Honey or Maple Syrup: For an extra-glossy finish.
- 1/2 teaspoon Liquid Smoke: (Hickory or Mesquite).
- 1 teaspoon Worcestershire Sauce: For an umami boost.
Equipment for Success
- Large Baking Sheet: A rimmed sheet prevents juices from spilling into your oven.
- Wire Cooling Rack: This is the “pro-tip” secret. Placing a wire rack inside the baking sheet allows hot air to circulate 360 degrees around the chicken, ensuring the bottom skin doesn’t get soggy.
- Aluminum Foil: For easy cleanup.
- Meat Thermometer: The only way to guarantee perfect doneness.
- Silicone Basting Brush: To apply the sauce evenly without stripping off the dry rub.
Step-by-Step Instructions: The Master Method
Step 1: Preparation and Drying
Remove your chicken from the refrigerator about 20 minutes before cooking to take the chill off. This ensures more even cooking.
Critical Step: Use paper towels to pat every single drumstick bone-dry. Moisture is the enemy of crispy skin. If the skin is wet, it will steam rather than crisp.
Step 2: Seasoning
In a small bowl, whisk together all the dry rub ingredients. Place the dried drumsticks in a large bowl and drizzle with a tablespoon of neutral oil (like avocado or vegetable oil). Sprinkle the rub over the chicken and use your hands to massage it in, ensuring every nook and cranny is covered.
Step 3: Setting Up the Oven
Preheat your oven to 400°F (200°C). Line your baking sheet with foil and place the wire rack on top. Arrange the drumsticks on the rack, leaving space between each one so they aren’t touching.
Step 4: The Initial Roast
Slide the tray into the center of the oven. Bake for 25 to 30 minutes. At this stage, we are rendering the fat and cooking the meat through. The sugar in the rub will begin to caramelize, creating a flavorful crust.
Step 5: The Basting Phase
While the chicken roasts, mix your BBQ glaze ingredients in a small bowl. After the initial 30 minutes, remove the tray from the oven. Using your basting brush, coat each drumstick generously with the sauce.
Return to the oven for another 10 minutes.
Step 6: The Second Glaze and Broil
For that “competition-style” look, apply a second layer of sauce. Switch your oven to the Broil setting (high). Place the tray on the top rack for 2 to 4 minutes. Watch it like a hawk! The sugars in the sauce will bubble and char slightly, creating those beautiful dark “burnt” spots that signify true BBQ flavor.
Step 7: The Rest
Internal temperature should reach 175°F to 185°F for drumsticks. Remove from the oven and let the chicken rest for 5 to 10 minutes. This allows the juices to redistribute, ensuring the first bite is as moist as possible.
The Science of Temperature: Why 165°F Isn’t Enough
While the USDA recommends a minimum internal temperature of 165°F for poultry safety, drumsticks are better when cooked higher. At 165°F, the meat near the bone can still be slightly tough and have a reddish tint that some find unappealing.
By aiming for 175°F – 185°F, the collagen in the drumstick melts into gelatin. This process, known as “denaturing,” turns a potentially rubbery leg into a “fall-off-the-bone” masterpiece. Because drumsticks have a high fat content, they won’t dry out at these temperatures.
Nutritional Profile: Is BBQ Chicken Healthy?
Chicken drumsticks are an excellent source of high-quality protein and essential minerals. While the BBQ sauce adds sugar, the overall meal remains a powerhouse of nutrition when balanced correctly.
- Protein: Essential for muscle repair and metabolic function. One drumstick provides roughly 12-15 grams of protein.
- Selenium: A powerful antioxidant that supports heart health and thyroid function.
- Vitamin B6: Crucial for brain development and keeping the nervous system healthy.
- Zinc: Supports the immune system and DNA synthesis.
Pro-Tip for Health-Conscious Eaters: Use a sugar-free BBQ sauce (sweetened with stevia or monk fruit) and omit the brown sugar in the rub to make this recipe Keto and Paleo-friendly.
Flavor Variations to Explore
Once you master the basic smoky BBQ drumstick, you can experiment with these international and creative variations:
1. The “Honey-Habanero” Kick
Add 2 tablespoons of honey and 1 teaspoon of habanero hot sauce to your glaze. The sweetness of the honey balances the intense heat of the habanero, while the smokiness of the paprika keeps it grounded.
2. Alabama White Sauce Style
Instead of a tomato-based red sauce, try an Alabama White Sauce made of mayonnaise, vinegar, plenty of black pepper, and horseradish. Baste this on in the final 5 minutes for a tangy, creamy, and smoky profile that is legendary in the South.
3. Memphis Dry-Rub Style
Omit the wet sauce entirely. Apply a double dose of the dry rub, adding extra celery salt and mustard powder. Bake until the skin is incredibly crispy and “bark-like.” Serve the sauce on the side for dipping.
4. Bourbon BBQ
Add a splash of high-quality bourbon to your glaze mixture. The alcohol cooks off, leaving behind notes of vanilla and charred oak that perfectly enhance the “smoky” theme.
What to Serve with Smoky BBQ Drumsticks
A great main course deserves equally impressive side dishes. To create a balanced plate, aim for a mix of “creamy,” “acidic,” and “starchy.”
- The Creamy: A classic Creamy Coleslaw is the perfect foil for smoky BBQ. The cold, crisp cabbage and tangy dressing cleanse the palate between bites of rich chicken.
- The Starchy: Honey Butter Cornbread or Smoked Gouda Mac and Cheese. These comfort foods soak up any extra BBQ sauce on the plate.
- The Healthy: Grilled Asparagus or a Roasted Corn Salad (Esquites). The charred flavor of the vegetables mirrors the smokiness of the chicken.
- The Classic: Baked Beans slow-cooked with bacon and brown sugar.
Common Mistakes to Avoid
- Crowding the Pan: If the drumsticks are touching, they will steam each other. This results in soft, rubbery skin. Always leave at least an inch of space between pieces.
- Applying Sauce Too Early: BBQ sauce has a high sugar content. If you put it on at the beginning of the 40-minute bake, the sugar will burn and turn bitter before the chicken is cooked through. Always wait until the last 15 minutes.
- Skipping the Rack: Baking chicken directly on a flat sheet means the bottom sits in its own rendered fat. While tasty, it prevents the skin from getting crispy all the way around.
- Using Cold Chicken: Taking chicken straight from the fridge to a 400°F oven can cause the meat to seize, leading to a tougher texture. Give it 20 minutes on the counter first.
Meal Prep and Storage
These drumsticks are a meal-prepper’s dream. They hold up incredibly well and can be used in various ways throughout the week.
- Fridge: Store in an airtight container for up to 4 days.
- Freezer: You can freeze cooked drumsticks for up to 3 months. To reheat, thaw in the fridge overnight.
- Reheating Tip: Avoid the microwave if you want to maintain the texture. Reheat in an oven or air fryer at 350°F for 8-10 minutes. This will re-crisp the skin and keep the meat juicy.
Creative Ways to Use Leftovers:
- BBQ Chicken Salad: Shred the meat and toss it over greens with black beans, corn, and ranch dressing.
- BBQ Chicken Pizza: Use the shredded meat as a topping with red onions and cilantro.
- Smoky Chicken Tacos: Reheat the meat with a little lime juice and serve in corn tortillas.
Frequently Asked Questions (FAQs)
Can I make this in an Air Fryer?
Absolutely! Set your air fryer to 380°F. Cook the seasoned drumsticks for 20-25 minutes, shaking the basket halfway through. Apply the sauce in the last 3-5 minutes of cooking. The air fryer is excellent for achieving maximum crispiness.
How do I know the chicken is done without a thermometer?
While a thermometer is best, you can check by piercing the thickest part of the drumstick with a knife. If the juices run completely clear (no pink or red tint), the chicken is done. Also, the meat should start to slightly pull away from the bone at the bottom.
Is it better to marinate overnight?
For this specific recipe, a long marinade isn’t strictly necessary because the dry rub and the final glaze provide so much surface flavor. However, if you want the flavor to penetrate deep into the bone, you can apply the dry rub up to 24 hours in advance.
Can I use this recipe for wings or thighs?
Yes! For thighs, increase the initial baking time by about 5-10 minutes as they are thicker. For wings, decrease the initial baking time to 20 minutes, as they cook much faster.
The Art of the Perfect “Char”
Many home cooks are afraid of the broiler, but it is the secret to restaurant-quality BBQ. The goal of the broiler phase isn’t to cook the meat—it’s to trigger the Maillard Reaction and caramelization of the sugars.
When the sauce bubbles and develops small black charred spots, it introduces a “bitter-sweet” complexity that is the hallmark of great BBQ. Just remember to stay by the oven; the transition from “perfectly charred” to “ruined” happens in about 30 seconds.
Bringing the Experience Together
Making Smoky BBQ Chicken Drumsticks in the oven is more than just a recipe; it’s a technique that allows you to bring the spirit of a summer cookout into your home any day of the year. By focusing on the preparation (drying the skin), the temperature (aiming for 185°F), and the smoky elements (paprika and liquid smoke), you create a dish that is consistently delicious.
This meal represents the best of home cooking: it’s affordable, it’s easy to scale for a crowd, it’s packed with flavor, and it’s a guaranteed hit with both kids and adults. So, preheat your oven, grab your favorite BBQ sauce, and get ready to enjoy the best drumsticks you’ve ever made.
Summary Checklist for the Perfect Batch:
- Dry the chicken thoroughly with paper towels.
- Season generously with a smoked paprika-based rub.
- Elevate the chicken on a wire rack for airflow.
- Roast at high heat (400°F) for texture.
- Glaze only in the final stages of cooking.
- Broil for that authentic, caramelized finish.
- Rest the meat to lock in the juices.
With these steps, you are no longer just baking chicken; you are crafting a smoky, sticky, savory experience that will have everyone reaching for “just one more leg.” Enjoy the process, experiment with your sauces, and most importantly, enjoy the feast!