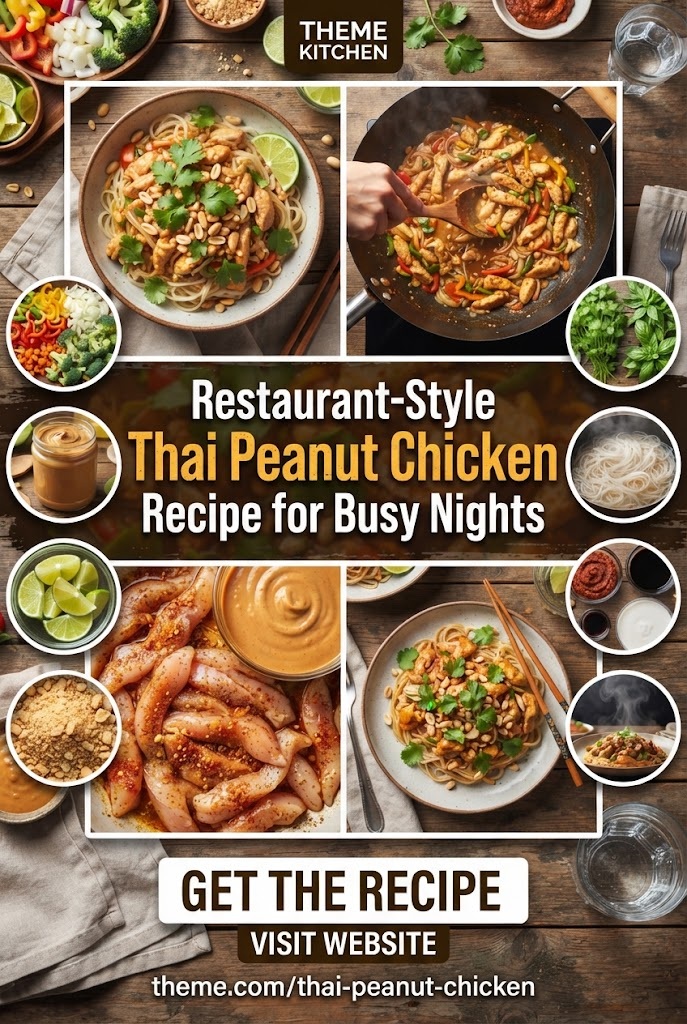
Restaurant-Style Thai Peanut Chicken Recipe for Busy Nights
The modern kitchen is often a place of conflict—a battleground between the desire for a healthy, vibrant, and flavorful meal and the reality of a grueling schedule. We crave the complex, aromatic profiles of our favorite local Thai bistro, yet we often settle for the lackluster convenience of a frozen meal or the expensive, sodium-heavy reality of takeout. But what if you could bridge that gap? What if you could produce a restaurant-quality Thai Peanut Chicken in under 30 minutes using ingredients already sitting in your pantry?
This isn’t just a recipe; it is a comprehensive masterclass in balancing the four pillars of Thai flavor: salty, sweet, sour, and spicy. Whether you are a seasoned home cook or a beginner looking to impress, this guide will walk you through the nuances of creating a velvety, rich, and deeply satisfying peanut sauce paired with tender, succulent chicken.
The Allure of Thai Peanut Chicken: Why It’s a Global Favorite
Thai cuisine is celebrated worldwide for its bold use of herbs and spices, but the “peanut chicken” phenomenon holds a special place in the hearts of Western diners. Known as Phra Ram Long Song (Swimming Rama) in its more traditional forms, or influenced by the satay traditions of Southeast Asia, the combination of savory legumes and creamy coconut milk creates a comfort food profile that is virtually unmatched.
The magic lies in the contrast. You have the crunch of fresh vegetables, the silkiness of the sauce, the zing of fresh lime, and the subtle heat of red chili. It is a dish that hits every taste bud simultaneously, providing a sensory experience that feels luxurious despite its simplicity.
The Anatomy of the Perfect Peanut Sauce
The soul of this dish is the sauce. A mediocre sauce is just thin peanut butter; a great sauce is a complex emulsion of fats, acids, and aromatics. To achieve restaurant-quality results, we must understand the components:
1. The Base: Creamy Peanut Butter
While traditional Thai cooking might involve roasting and grinding raw peanuts, for a busy weeknight, high-quality creamy peanut butter is your best friend. Look for a brand that isn’t overly sweetened. The natural oils in the peanut butter provide the body and richness that coat the chicken perfectly.
2. The Creaminess: Full-Fat Coconut Milk
Do not reach for the “lite” version. The fat content in coconut milk is essential for carrying the fat-soluble flavors of the spices and providing that characteristic velvety texture. It also acts as a cooling agent against the heat of the chilies.
3. The Umami: Fish Sauce or Soy Sauce
Fish sauce (Nam Pla) is the backbone of Thai seasoning. It provides a deep, salty funk that transforms into pure savory bliss when cooked. If you are hesitant about the smell, don’t worry—it mellows significantly. If you must substitute, use a high-quality Tamari or Soy Sauce.
4. The Brightness: Lime Juice and Rice Vinegar
Without acidity, peanut sauce can feel heavy and cloying. Freshly squeezed lime juice provides a citrusy lift, while rice vinegar adds a sharp, clean tang that cuts through the fat of the nuts and coconut milk.
5. The Heat: Red Curry Paste or Sriracha
Thai Red Curry Paste is a concentrated explosion of galangal, lemongrass, shrimp paste, and red chilies. A single tablespoon adds layers of complexity that would take hours to build from scratch. For a more direct, vinegary heat, Sriracha is an excellent addition.
6. The Sweetener: Brown Sugar or Honey
To balance the salt and spice, a touch of sweetness is mandatory. Brown sugar adds a hint of molasses flavor that pairs beautifully with the roasted notes of the peanuts.
Ingredients You Will Need
Before you start the stove, ensure your mise en place is ready. This dish moves fast once the heat is on.
For the Chicken and Aromatics:
- Chicken Breast or Thighs: 1.5 lbs, thinly sliced into bite-sized strips. (Thighs are more forgiving and stay juicier, while breasts are leaner).
- Garlic: 4 cloves, minced.
- Fresh Ginger: 1 tablespoon, grated or finely minced.
- Cooking Oil: 2 tablespoons of a high-smoke-point oil (Avocado, Grapeseed, or Peanut oil).
- Red Bell Pepper: 1 large, thinly sliced.
- Snap Peas or Broccoli: 1 cup, for a vibrant crunch.
For the Signature Peanut Sauce:
- Peanut Butter: 1/2 cup (creamy is preferred).
- Full-Fat Coconut Milk: 1 can (13.5 oz).
- Thai Red Curry Paste: 1–2 tablespoons (depending on your spice tolerance).
- Soy Sauce/Tamari: 2 tablespoons.
- Fish Sauce: 1 teaspoon (optional, but highly recommended).
- Honey or Brown Sugar: 2 tablespoons.
- Rice Vinegar: 1 tablespoon.
- Lime Juice: The juice of half a lime.
For Garnish (The “Pro” Touch):
- Fresh Cilantro: Roughly chopped.
- Crushed Peanuts: For texture.
- Green Onions: Thinly sliced on a bias.
- Lime Wedges: For serving.
- Red Chili Flakes: For those who want extra heat.
Step-by-Step Instructions: Mastering the Technique
Step 1: Prep the Chicken (The “Velveting” Secret)
If you’ve ever wondered why restaurant chicken is so much more tender than yours, the secret is “velveting.” In a bowl, toss your sliced chicken with 1 teaspoon of cornstarch and a splash of soy sauce. Let it sit for 10 minutes while you prep the vegetables. The cornstarch creates a thin barrier that locks in juices and helps the sauce cling to the meat.
Step 2: Searing the Protein
Heat your wok or a large skillet over medium-high heat. Add the oil. Once shimmering, add the chicken in a single layer. Do not crowd the pan; work in batches if necessary. Sear the chicken until golden brown on the outside (about 3 minutes per side). It doesn’t need to be fully cooked through yet. Remove the chicken and set it aside.
Step 3: Sauté the Aromatics and Vegetables
In the same pan (don’t wash it! those brown bits are flavor), add a little more oil if needed. Toss in the garlic and ginger. Sauté for only 30-60 seconds until fragrant—do not let the garlic burn. Add the bell peppers and snap peas. Stir-fry for 2-3 minutes until they are bright in color but still retain a “snap.”
Step 4: Building the Sauce
Lower the heat to medium. Push the vegetables to the side and add the red curry paste. Fry the paste for 1 minute to “wake up” the essential oils. Pour in the coconut milk and whisk in the peanut butter, soy sauce, fish sauce, sugar, and vinegar. Stir continuously until the peanut butter has melted and the sauce is a smooth, uniform orange-brown color.
Step 5: The Marriage of Flavors
Return the seared chicken and any accumulated juices back into the pan. Simmer gently for 5 minutes. This allows the chicken to finish cooking through while the sauce thickens and the flavors meld together. If the sauce becomes too thick, add a tablespoon of water or chicken broth to reach your desired consistency.
Step 6: The Finishing Flourish
Remove the pan from the heat. Squeeze in the fresh lime juice. This final hit of acidity brightens the entire dish. Taste and adjust—does it need more salt (soy sauce)? More heat (Sriracha)? More sweet (honey)?
Pro Tips for the Best Results
Don’t Overcook the Vegetables
The biggest mistake in home stir-frying is mushy vegetables. You want the peppers to be tender-crisp. Adding them after the aromatics and removing the pan from heat promptly ensures they stay vibrant.
Using the Right Peanut Butter
While “natural” peanut butters (just peanuts and salt) are great for toast, they can sometimes separate in a sauce. If using natural peanut butter, make sure to whisk vigorously. Standard commercial brands like Jif or Skippy actually work very well here because they contain emulsifiers that keep the sauce perfectly smooth.
Temperature Control
Coconut milk can “split” or become oily if boiled too violently for too long. Maintain a gentle simmer rather than a rolling boil once the coconut milk is added.
Dietary Adaptations and Variations
The beauty of Thai Peanut Chicken is its versatility. You can easily tweak this recipe to fit various dietary needs without sacrificing the soul of the dish.
1. The Vegetarian/Vegan Version
Substitute the chicken with extra-firm tofu or tempeh. For the best texture, press the tofu to remove excess water, cube it, and pan-fry it until crispy before adding it to the sauce. Ensure you use soy sauce instead of fish sauce and maple syrup instead of honey.
2. Low-Carb / Keto Options
Peanut chicken is naturally high in healthy fats and protein. To make it strictly Keto, replace the sugar with a keto-friendly sweetener like monk fruit or erythritol. Serve the chicken over a bed of cauliflower rice or zoodles (zucchini noodles) instead of traditional white rice.
3. Gluten-Free Adjustments
This recipe is very easy to make gluten-free. Simply ensure your soy sauce is replaced with Tamari or liquid aminos, and double-check that your red curry paste brand is certified GF.
4. Adding More Bulk (Extra Veggies)
If you want to stretch the meal or increase your fiber intake, this sauce pairs beautifully with:
- Baby corn
- Water chestnuts
- Carrots (julienned)
- Spinach or Kale (folded in at the very end)
- Eggplant (diced and sautéed early)
What to Serve with Thai Peanut Chicken
To turn this into a complete feast, consider these pairing options:
Jasmine Rice
The gold standard. The floral aroma of Jasmine rice complements the coconut and peanut flavors perfectly. The grains are excellent at soaking up the extra sauce.
Rice Noodles
For a “Pad Thai” feel, toss the chicken and sauce with cooked wide rice noodles. The starch in the noodles will help the sauce thicken even further.
Quinoa
For a modern, high-protein twist, serve over fluffy quinoa. The nutty flavor of the grain works surprisingly well with the peanut base.
Side Salads
A cold cucumber salad with a light rice vinegar dressing provides a refreshing, cooling contrast to the warm, spicy chicken.
Meal Prep and Storage Instructions
This is one of those rare dishes that actually tastes better the next day as the spices continue to infuse the protein.
- Fridge: Store in an airtight container for up to 4 days. When reheating, you may notice the sauce has thickened significantly (the fats solidify when cold). Add a splash of water or coconut milk before microwaving or reheating on the stove to loosen it back up.
- Freezer: You can freeze Thai Peanut Chicken for up to 3 months. However, be aware that coconut-based sauces can sometimes change texture slightly upon thawing. Defrost in the fridge overnight and stir well during reheating.
- Meal Prep Tip: Portioned out with rice and steamed broccoli, this makes for an incredible “grab-and-go” work lunch that will be the envy of the office breakroom.
The Science of Flavor: Why We Love Peanut and Lime
The obsession with peanut sauce isn’t just a trend; it’s rooted in food science. Peanuts are rich in proteins and fats that provide a “round” mouthfeel. When you combine this with the capsaicin in the curry paste, the fat in the peanut butter and coconut milk actually helps to bind to the heat receptors on your tongue, preventing the spice from becoming overwhelming.
The addition of lime juice is a “brightener.” Scientifically, citric acid helps to stimulate saliva production, which makes the flavors of the ginger and garlic feel more intense and immediate. This balance of “fat + acid + heat” is the secret formula used by top chefs globally to create “craveable” food.
Frequently Asked Questions (FAQ)
Can I make this in a slow cooker or Crockpot?
Yes! Add the chicken, aromatics, and the sauce components (except for the lime and fresh veggies) to the slow cooker. Cook on low for 3-4 hours. Add the vegetables in the last 30 minutes so they don’t turn to mush. Stir in the lime juice just before serving.
What if I don’t have Red Curry Paste?
You can substitute with 1 tablespoon of curry powder and a pinch of cayenne pepper. It won’t have the same depth of flavor as the paste, but it will still produce a delicious, aromatic meal.
Is Thai Peanut Chicken healthy?
Generally, yes! It is packed with lean protein and healthy fats from peanuts and coconut. To keep it on the lighter side, increase the ratio of vegetables to chicken and serve it with brown rice or cauliflower rice.
Why is my sauce gritty?
Grittiness usually happens if you use “natural” peanut butter that hasn’t been stirred well or if the ginger wasn’t minced finely enough. Ensure your ginger is grated into a paste for the smoothest texture.
Can I use peanut flour instead of peanut butter?
It is possible, but you will lose the creamy texture. You would need to add significantly more fat (like extra coconut milk or oil) to compensate for the missing oils in the peanut butter.
Final Thoughts: Bringing the Restaurant Home
Creating a “Restaurant-Style” meal isn’t about having a professional kitchen; it’s about understanding the layers of flavor. By taking the time to sear the chicken, bloom the spices, and balance the sauce with lime and sugar, you elevate a simple stir-fry into a gourmet experience.
This Thai Peanut Chicken recipe is a testament to the fact that busy nights don’t have to mean boring food. It’s fast, it’s nutritious, and most importantly, it’s delicious. So, put down the takeout menu, turn on the stove, and prepare to have your kitchen smell like the best Thai restaurant in town.
Summary Checklist for Success:
- Prep everything before you turn on the heat.
- Velvet the chicken with cornstarch for maximum tenderness.
- Use full-fat coconut milk for the best sauce consistency.
- Don’t skip the lime juice—it’s the secret to “bright” flavor.
- Garnish generously with cilantro and crushed peanuts for that authentic look and feel.
Enjoy your culinary journey into the heart of Thai-inspired flavors. Once you master this base recipe, the possibilities for customization are endless. Happy cooking!